Basics
Make sure you've completed the setup instructions to install dependencies and get the development server running.
Now that we have set up our development environment, let's get started by creating a simple web page with an OpenLayers map, and understand the code.
In OpenLayers, a map is a collection of layers that get rendered to a web page. To create a map, you need some markup (HTML) that creates the map viewport (e.g. a <div> element), a bit of style to give the map viewport the appropriate dimensions on your page, and map initialization code.
OpenLayers supports different kinds of layers:
- Tile layers for tiled raster tile sets
- Image layers for static images or images that are provided on demand for the map's extent
- Vector layers for vector data from static files or for the map's current extent
- Vector tile layers for tiled vector tile sets
In addition to the layers and the view, a map can be configured with a set of controls (i.e. UI elements on top of the map) and interactions (i.e. components that react to touch or pointer gestures on the map).
The markup
There should be an existing index.html file at the root of the workshop directory. Let's replace it with the following code:
<!DOCTYPE html>
<html>
  <head>
    <meta charset="utf-8">
    <title>OpenLayers</title>
    <style>
      @import "node_modules/ol/ol.css";
    </style>
    <style>
      html, body, #map-container {
        margin: 0;
        height: 100%;
        width: 100%;
        font-family: sans-serif;
      }
    </style>
  </head>
  <body>
    <div id="map-container"></div>
    <script src="./main.js" type="module"></script>
  </body>
</html>
The markup includes a <div> with an id of map-container that serves as the target container for the map. The <style> makes the map container fill the whole page.
The application
To work with OpenLayers, we install the ol package from npm. This was already done in the previous npm install step. If you were starting from scratch on a new application, you would run npm install ol in the terminal.
As entry point of the application, we create a main.js file, and also save it in the root of the workshop directory:
import OSM from 'ol/source/OSM';
import TileLayer from 'ol/layer/Tile';
import {Map, View} from 'ol';
import {fromLonLat} from 'ol/proj';

new Map({
  target: 'map-container',
  layers: [
    new TileLayer({
      source: new OSM(),
    }),
  ],
  view: new View({
    center: fromLonLat([0, 0]),
    zoom: 2,
  }),
});
The imports at the top bring in the required modules from the ol package. With everything we need imported, we create a Map. The target points to the container <div> we have in our markup. We configure the map with a tiled image layer (TileLayer) and an XYZSource. Finally, the View defines the initial zoom, and the center of the map in the view projection. To provide geographic coordinates, we use the fromLonLat helper function from the ol/proj module.
Viewing the map
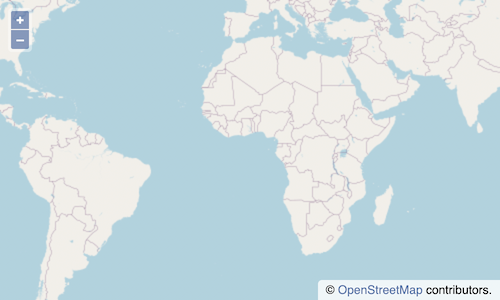
Now our application is ready for testing. Let's open the working map in a web browser: http://localhost:5173/. This is how it should look:
Further reading
In the final chapter of the workshop, we will learn how create a production build of the application for deployment.
As a starting point for your own applications, we recommend looking at the examples.
The API documentation provides reference to all classes and functions of OpenLayers.